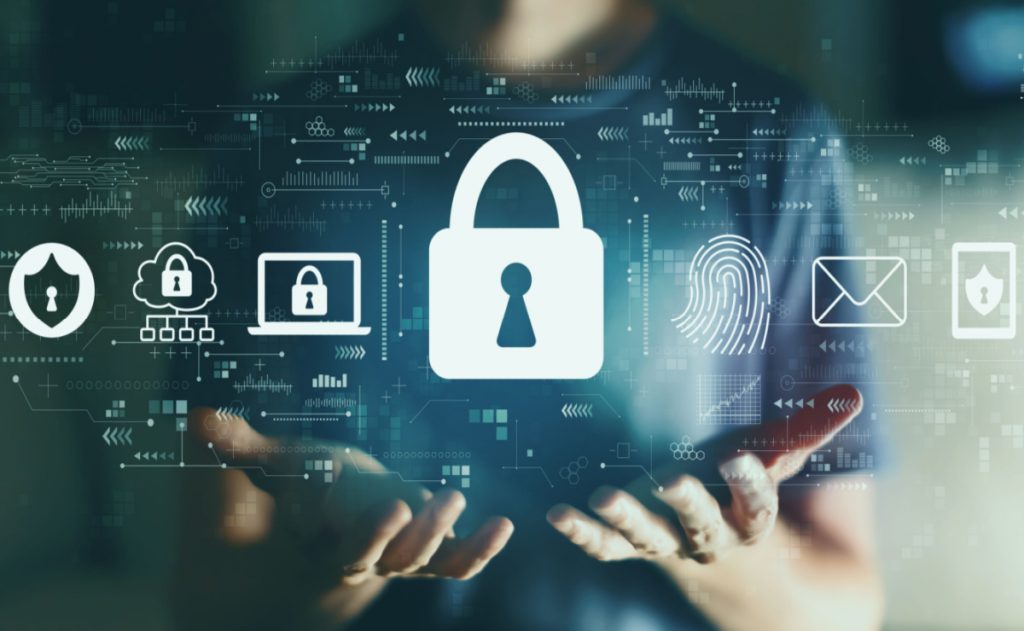
Categories
General

Why A Second Chance Checking Account Could Be Your Smartest Move Yet?

Financial mistakes can happen to anyone — an overdraft here, a missed payment there, or even an account closure due to unpaid fees. Regretfully, these errors may permanently alter your banking record, making it more challenging to create a new account with conventional banks. But the good news is that rebuilding your financial credibility is possible, and one of the most effective ways to do it is through a second chance checking account.

This type of account is designed to help individuals regain access to the banking system while encouraging responsible money management. It can be the cornerstone of a more stable financial future rather than merely a band-aid solution. 

Understanding The Purpose

Many banks and credit unions use screening systems, like chexsystems, to review an applicant’s past account activity. If there’s a history of unpaid fees, frequent overdrafts, or account closures, it can trigger a denial for a new account.

That’s where second-chance banking comes in — it gives people a way to start fresh. These accounts typically have some restrictions at the start, such as monthly fees or limits on specific transactions, but they offer all the essential services needed for everyday financial life.

Regaining Access To Essential Services

Without a bank account, even simple tasks like paying bills, cashing checks, or setting up direct deposit become complicated and costly. Check-cashing stores, prepaid debit cards, and money orders often charge high fees, eating into your income.

By opening a second chance option, you can once again have access to:

  • Debit cards for ATM withdrawals and purchases.
  • Online and mobile banking tools.
  • Direct deposit for faster paychecks.
  • Automatic bill pay for convenience and timeliness.

This accessibility not only saves you money but also puts you back in control of your financial transactions.

Building Better Banking Habits

One of the most significant benefits of this type of account is that it encourages responsible money management. Because there may be limits on overdrafts or stricter monitoring of activity, you’re more likely to develop healthy habits, such as:

  • Tracking account balances regularly.
  • Paying bills on time.
  • Avoiding unnecessary fees.
  • Sticking to a budget.

These routines become second nature over time and may eventually make you eligible for better financial products. 

A Stepping Stone To Greater Opportunities

After proving responsible use for a predetermined amount of time, usually six to twelve months, the majority of financial institutions that provide these accounts permit you to upgrade to a regular checking account. Once upgraded, you may enjoy lower fees, overdraft protection, and additional perks.

This progression not only restores your access to better banking options but also improves your financial reputation. In turn, it can help you when applying for loans, credit cards, or even rental housing, as landlords sometimes check banking history.

The Role Of Credit Unions

Credit unions are often at the forefront of providing these opportunities. Member-owned and mission-driven, credit unions differ from big banks that prioritize profit. They tend to view second chance programs as part of their community service — offering guidance, resources, and flexibility to help members succeed.

Many also pair these accounts with financial education tools, such as workshops, credit counseling, and budgeting assistance. This combination of access and education can make the difference between simply having an account and truly improving your financial health.

Why It’s A Smart Move?

Opting for a second-chance checking account isn’t about dwelling on past mistakes — it’s about moving forward. It demonstrates a willingness to take responsibility and work toward stability. The structure of these accounts is designed to protect you from repeating old patterns while giving you the tools to succeed.

It’s also a cost-effective decision. The money you save from avoiding check-cashing fees, late payment penalties, and other extra costs can be redirected toward savings, debt repayment, or personal goals.

Final Thoughts

Rebuilding your banking history takes time, but the right account can speed up the process and make it far less stressful. By providing both the access you need and the accountability that fosters good habits, this type of account can be a powerful ally in your financial journey. If you’ve faced setbacks and want a fresh start, exploring this option with a supportive institution could be one of the smartest financial moves you’ll ever make — transforming current challenges into future opportunities.

Categories
General

Seasonal Home Maintenance Checklist You Didn’t Know You Needed

Owning a home comes with many joys—and a fair share of responsibilities. While major repairs often grab our attention, it’s the little things that, when overlooked, can lead to costly damage over time. That’s where seasonal home maintenance comes in. Regular upkeep not only protects your investment but also keeps your home safe, efficient, and comfortable year-round.

Here’s a seasonal home maintenance checklist you probably didn’t know you needed—but will be glad you have.

Spring: Refresh and Inspect

Spring is the season of renewal, making it the perfect time to inspect your home for any damage caused during winter.

  1. Check the Roof
    Winter storms can damage shingles, flashing, and gutters. Use binoculars or safely climb up to inspect for loose or missing shingles and signs of leaks.
  2. Clean Gutters and Downspouts
    Clogged gutters can cause water damage to your roof and foundation. Clean them out and ensure water flows away from your home.
  3. Inspect Exterior Walls and Paint
    Look for cracks, peeling paint, or water stains. These can be early signs of larger issues and are easier to fix now than later.
  4. Service HVAC System
    Before the heat hits, have your air conditioning serviced. Replace filters and clean vents for better air quality and efficiency.
  5. Lawn Equipment Check
    Sharpen mower blades, replace spark plugs, and top off oil in your lawn equipment. You’ll be ready when grass starts to grow.

Summer: Prevent and Protect

Summer is the ideal time to focus on outdoor maintenance and prevent heat-related problems inside the home.

  1. Inspect and Seal Windows/Doors
    Hot air sneaks in, and cool air escapes through tiny gaps. Check weather stripping and caulk around windows and doors to improve efficiency.
  2. Check Decks and Patios
    Look for loose boards, nails, or signs of rot. Re-stain or reseal wood surfaces to protect them from sun and rain damage.
  3. Clean the Dryer Vent
    Lint buildup in dryer vents is a fire hazard. Clean the vent and duct to improve performance and safety.
  4. Flush Water Heater
    Sediment buildup reduces efficiency. Flushing the tank helps your water heater work better and last longer.
  5. Test Smoke and Carbon Monoxide Detectors
    Hot summer temperatures can affect battery life. Press the test button and replace batteries if needed.

Fall: Prepare and Preserve

Fall is all about getting ready for the colder months ahead. Preventative steps now can save you from major headaches in winter.

  1. Clean Chimney and Fireplace
    Before lighting that first fire, have your chimney professionally cleaned and inspected for blockages or buildup.
  2. Inspect the Furnace
    Schedule a checkup before cold weather arrives. Replace filters and make sure your thermostat is functioning properly.
  3. Drain Outdoor Faucets and Hoses
    To prevent freezing and bursting, disconnect hoses and shut off exterior water lines. Drain them thoroughly.
  4. Inspect the Attic and Insulation
    Check for signs of pests, leaks, or inadequate insulation. Proper insulation saves on heating bills.
  5. Seal Driveway Cracks
    Water that seeps into cracks can freeze and expand during winter, making them worse. Seal them now while temperatures are still mild.

Winter: Watch and Maintain

Winter’s harsh conditions require vigilance to prevent damage caused by cold, snow, and ice.

  1. Protect Pipes from Freezing
    Insulate pipes in unheated areas like basements, garages, and crawlspaces. Keep a slow trickle of water flowing on freezing nights.
  2. Check for Ice Dams
    Ice buildup on the roof edge can lead to leaks. Keep gutters clear and consider installing heat cables if needed.
  3. Monitor Indoor Humidity
    Low humidity can damage wood and worsen respiratory issues. Use a humidifier to maintain comfortable indoor levels.
  4. Reverse Ceiling Fans
    Switch the direction of your fans to clockwise in winter to circulate warm air downwards and reduce heating costs.
  5. Stock Emergency Supplies
    Power outages happen. Keep flashlights, batteries, bottled water, and blankets handy.

Final Thoughts

A little maintenance goes a long way. By breaking tasks down seasonally, you can stay ahead of problems and protect the comfort and value of your home. Use this checklist as a guide—and check in each season.

Find more insights in these resources :

https://familyhousepai.com/ 
https://familleeducation.org/
https://gotomariko.com/
https://jetaport.com/
https://theloverspoint.com/
https://godblogcon.com/
https://leadershipeditors.com/
https://wahcbd.com/
https://exclusivenewstoday.com/
https://premiobrasilambiental.com/
https://youarebeingwatched.us/
https://kidsearnmoney.co/
https://newportbluesfestival.co.uk/
https://maitreyarelictour.com/
https://sandranews.com/
https://cryptexplorer.com/
https://offiice-officecom.com/
https://revisedtruth.com/
https://balarindangnews.com/
https://creativehomestaging.net/
https://pokercewek.org/
https://israup.net/
https://mx-df.net/
https://inewsiran.com/
https://madeinitalytravel.com/
https://i-mpressmta.com/
https://amarillaautomotores.com/
https://newstotop.com/

Categories
General

The Paradox of Choice: Why Less Really Is More

In today’s world, we’re surrounded by abundance. Supermarkets offer dozens of cereal brands. Streaming platforms suggest thousands of shows. Even a simple online shopping session can leave you overwhelmed with options. At first glance, this seems like progress — a sign of freedom, convenience, and customization. But research and personal experience increasingly show otherwise. This overwhelming abundance has a downside: the paradox of choice.

The paradox of choice, a term popularized by psychologist Barry Schwartz, refers to the idea that while having some choice is good, having too much can lead to anxiety, indecision, and dissatisfaction. It’s a surprising concept in a culture that equates more with better — but one that’s becoming more relevant in the digital age.

Too Many Choices = Decision Fatigue

When you’re presented with endless options, your brain works harder to analyze, compare, and predict the outcomes of each one. This is called decision fatigue, and it drains mental energy. Think of browsing Netflix for 30 minutes, only to give up and rewatch something familiar. Or standing in the toothpaste aisle, frozen between 15 different variations, all promising similar results. It’s not that the choices are bad — it’s that there are too many of them. The more choices we face, the harder it becomes to make even simple decisions.

The Pressure to Choose Perfectly

Another hidden cost of choice overload is the pressure to choose the best. Whether you’re buying a laptop or picking a vacation spot, the presence of many good options can raise your expectations. You start to believe there must be a perfect choice out there — and anything less will be a mistake. This often leads to analysis paralysis, where we delay or avoid making decisions altogether. And when we finally do choose, we’re more likely to second-guess ourselves or regret what we didn’t pick. Satisfaction drops, even if the outcome was objectively good.

Minimalism as a Solution

The answer isn’t to eliminate all choice, but rather to curate and simplify. This is where minimalism comes in — not just as an aesthetic, but as a mindset. By narrowing our focus to what truly matters, we reduce cognitive clutter. We free ourselves from constantly evaluating, comparing, and optimizing every little decision. Choosing less can mean fewer distractions, clearer priorities, and ultimately, more peace of mind.

Consider capsule wardrobes. Instead of owning 50 pieces of clothing, someone might stick to 20 versatile items that mix and match well. This reduces decision-making in the morning, increases satisfaction with what’s worn, and aligns with personal values like sustainability. Or look at people who limit their social media apps to one or two platforms. They often report more time, better focus, and less anxiety.

Quality Over Quantity

A key benefit of fewer choices is the shift from quantity to quality. With fewer options to sort through, we tend to be more thoughtful about our decisions. We invest more attention in what we choose and value it more deeply. Whether it’s friendships, work commitments, or the items we bring into our homes, intentionality becomes the focus. Instead of scattering ourselves across many things, we go deeper with the few that matter.

Creating Space for What Matters

Ultimately, the paradox of choice teaches us an important lesson: real freedom isn’t just about having all the options — it’s about having the right ones. When we intentionally limit our choices, we make room for greater clarity, fulfillment, and purpose. We don’t need to fill every shelf, calendar slot, or opportunity. In fact, some of the most powerful lives are built not on what’s added — but on what’s left out.

So the next time you’re overwhelmed by decisions, consider this: more isn’t always better. Sometimes, the path to more joy, focus, and peace begins with choosing less.

Here are some helpful resources to explore :

https://uggaustraliasalenet.com/
https://francemedianews.com/
https://autofans.us/
https://travellingtrailer.com/
https://kumpulanbandarpoker.org/
https://bartonunited.co.uk/
https://farianews.com/
https://evemed.co.uk/
https://thecbdstoreonline.com/
https://nixsmate.com/
https://newsoaxaca.com/
https://mrfinancechallenge.com/ 
https://destinationovertornea.org/
https://fallenandflawed.com/
https://micanet.net/
https://roverpolo.org/
https://tamava.org/
https://isleuthhound.com/
https://nodalpoint.net/
https://keralanewsnow.com/
https://nr-7releases.com/
https://nkhomegroup.com/
https://truenewsd.com/
https://humaswonogirinews.org/
https://swisscartier.co.uk/
https://luellemag.com/
https://sammatson.net/
https://wesserblog.co.uk/
https://legalkushfly.com/
https://bzahomestylecrafts.com/

Categories
General

Candle Styles You Need to Know About: Pillar, Votive, and Taper

Candles are more than just sources of light; they set the tone of a room, create atmosphere, and provide moments of relaxation. Whether you’re looking for a calming scent to enhance your space or just a stylish accessory for your home decor, choosing the right candle style is essential. Candles like pillar, votive, and taper candles are the most popular types. Each has its unique shape, size, and use, making it crucial to understand the differences before you make a purchase. In this article, we’ll explore these three classic candle styles and discuss how they can complement your home.

Pillar Candles

Pillar candles are a staple in many households due to their versatility and long-lasting burn time. These candles are usually thick, sturdy, and round, which makes them perfect for making a dramatic, classy show. There are different heights and sizes of pillar candles, so you can make your decor fit your needs.

A significant advantage of pillar candles is their ability to stand on their own without the need for a candle holder. Their solid wax structure allows for a clean and uniform burn, making them ideal for creating a cozy, ambient atmosphere. For instance, placing a few pillar candles on a mantelpiece or dining table can instantly elevate the look of any room.

One popular scent that pairs perfectly with pillar candles is bergamot. Known for its citrusy and slightly floral aroma, bergamot candles can bring a fresh, uplifting ambiance to your home. These candles not only look beautiful but also offer an invigorating fragrance that helps promote relaxation and reduce stress. Whether you’re using them for their aesthetic value or to enjoy their aromatic properties, pillar candles are a fantastic choice for any home.

Votive Candles

Votive candles are small, compact candles that are typically placed in a holder. They are often used in groups to add a cozy, intimate vibe to a room. The name “votive” comes from the fact that they were historically used in religious ceremonies, often lit as offerings or prayers. While votive candles are smaller than pillar candles, they offer a similar level of ambiance but in a more concentrated form.

Votive candles usually burn for several hours, making them a great option for long evenings of relaxation or for creating a calming atmosphere during a dinner party. They’re ideal for smaller spaces, as their size allows them to be placed anywhere from windowsills to bathroom countertops. The right scent can enhance the space, and bergamot candles make an excellent choice for creating a light, fresh atmosphere. You can also put these candles in pretty candle stands to make any room look more elegant. Their small size doesn’t mean they lack in impact—several votive candles grouped together can create a beautiful, glowing display.

Taper Candles

Taper candles are long, slender candles often seen in candle holders or candelabras. These elegant candles are usually placed in pairs or sets to create a formal, romantic look. Taper candles have a classic, timeless appeal, often seen in candlelit dinners, weddings, and religious settings. They come in a range of colors and lengths, but the traditional taper candle is tall and thin, allowing it to burn for several hours.

The graceful nature of taper candles makes them perfect for creating a refined atmosphere. You can place them on a dining table, in a hallway, or on a windowsill to cast a warm, flickering light. The most significant benefit of taper candles is their ability to add a touch of sophistication to any space, whether it’s for a formal dinner party or a simple evening of relaxation.

As with the other candle styles, bergamot candles work wonderfully in taper form. Their bright, citrus fragrance, combined with the elegance of taper candles, can add a sense of tranquility to any event or setting. The subtle fragrance fills the room without overpowering the space, offering a pleasant scent that soothes the senses.

Conclusion

Each candle style—pillar, votive, and taper—has its own unique benefits and aesthetic appeal. Whether you’re using pillar candles for dramatic flair, votives for intimate settings, or tapers for elegance, each style can help create a desired ambiance in your home. And with versatile scents like bergamot candles, you can tailor your candle experience to match your mood and environment. So, the next time you’re browsing for candles, consider the space, occasion, and style you want to create. With the right candle, you can effortlessly elevate the atmosphere of any room.


Categories
General

The Science of Habit Formation: How to Build Good Habits That Stick

Habits shape our daily lives, influencing everything from our health and productivity to our happiness and success. But why is it that some habits stick effortlessly while others seem impossible to maintain? The answer lies in the science of habit formation. By understanding how habits work, you can build positive routines that last.

How Habits Form: The Habit Loop

Psychologists have identified a simple neurological pattern that governs habit formation, known as the habit loop, which consists of three key elements:

  1. Cue (Trigger): A specific event or situation that signals the start of the habit.
  2. Routine (Behavior): The action or habit itself.
  3. Reward: The benefit or satisfaction gained from completing the routine.

For example, if you wake up and immediately reach for your phone (cue), scroll through social media (routine), and feel entertained or informed (reward), you’ve completed a habit loop. Over time, this loop becomes automatic.

Why Some Habits Stick and Others Don’t

Not all habits form equally. Some behaviors become second nature quickly, while others require conscious effort. Research suggests that habits stick better when they are:

  • Easy to start: Complex or overwhelming habits are harder to maintain.
  • Tied to existing behaviors: Linking new habits to existing routines makes them easier to adopt.
  • Rewarding: The brain loves instant gratification, so habits with immediate benefits are easier to sustain.
  • Repeated consistently: Studies show that repetition strengthens neural pathways, making habits automatic.

Proven Strategies to Build Good Habits

1. Start Small

Many people fail at habit formation because they aim too high too fast. Instead of committing to an hour of exercise daily, start with just five minutes. Small habits are easier to sustain and build momentum over time.

2. Use Habit Stacking

Habit stacking involves linking a new habit to an existing one. If you brush your teeth every morning, you can use that time to practice gratitude or listen to an audiobook. This method helps integrate new behaviors into your routine seamlessly.

3. Make It Easy and Convenient

If a habit requires too much effort, it’s unlikely to stick. Want to eat healthier? Keep healthy snacks within reach. Trying to exercise more? Lay out your workout clothes the night before. Reduce friction between you and the habit.

4. Reward Yourself Immediately

The brain craves instant gratification, so build in rewards. For example, after a workout, allow yourself to listen to your favorite podcast or drink a smoothie. The reward reinforces the behavior, making you more likely to repeat it.

5. Track Your Progress

Keeping track of your habits helps reinforce consistency. Use a habit tracker, calendar, or app to mark each successful day. The satisfaction of seeing progress creates a psychological reward, motivating you to continue.

6. Plan for Setbacks

No one is perfect. If you miss a day or two, don’t abandon the habit altogether. Research shows that occasional slip-ups don’t disrupt habit formation if you resume quickly. The key is consistency, not perfection.

7. Build an Identity Around Your Habit

The most powerful way to make a habit stick is to integrate it into your identity. Instead of saying, “I want to run more,” say, “I am a runner.” This mindset shift reinforces long-term behavior.

Final Thoughts

Building good habits that last isn’t about willpower alone, it’s about strategy. By understanding the habit loop, starting small, making habits easy, rewarding progress, and planning for setbacks, you can create positive routines that become a natural part of your life. Small changes, repeated over time, lead to big results.

Explore these resources:

https://thewestaustralia.com.au/
https://thebrisbanetimes.com.au/
https://republicworld.com.au/
https://perthpost.com.au/
https://nswlive.com.au/
https://melbournejurnal.com.au/
https://perthstar.com.au/
https://news18.com.au/
https://mashable.com.au/
https://the-sun.com.au/
https://business-standard.com.au/
https://wionews.com.au/
https://thequint.com.au/
https://financialexpress.com.au/
https://theglobeandmail.com.au/
https://forbes-australia.com.au/
https://mensjournal.com.au/
https://homecrux.com.au/
https://allhomeliving.com.au/
https://goodhousekeeping.com.au/
https://homedit.com.au/
https://thehealthsite.com.au/
https://healthkart.com.au/
https://nerdfitness.com.au/
https://wellnessmama.com.au/
https://naturalnews.com.au/
https://taycanarcade.com.au/
https://ebusinessname.com.au/
https://ebusinessnames.com.au/

Categories
General

How Lighting Can Make Or Break Your Real Estate Photos

Photography of real estate is an important part of marketing a home or business for sale. Buyers often form their first opinions of a home based on pictures they see online. This means that the quality of the pictures they see can determine whether they will schedule a viewing of the home. Lighting is one of the most important parts of taking good pictures of real estate. If you have the right lighting, a room will look warmer, bigger, and more appealing. If you don’t have the right lighting, even the most beautiful home will look cold and unwelcoming.

The Importance of Lighting in Real Estate Photography

Lighting is one of the most important factors in photography because it affects the overall appearance, mood, and quality of the images. In real estate photography, proper lighting is essential for a few key reasons:

  1. Visibility and Clarity: Good lighting ensures that all areas of the property are clearly visible. Buyers want to see every detail, from the texture of the countertops to the flooring in each room. Poor lighting can leave areas in shadow, hiding key details and making the space look less appealing.

  1. Accurate Color Representation: Natural and artificial lighting affect the way colors appear in photos. A well-lit room will show the true colors of walls, furnishings, and flooring, which will help potential buyers visualize the home more accurately. Improper lighting, on the other hand, can distort colors, making them look washed out or overly harsh.

  1. Creating a Welcoming Atmosphere: Homes that are brightly and warmly lit appear more inviting. Natural light is especially effective at making spaces look welcoming and spacious. Dark, poorly lit rooms can feel cramped, cold, and uninviting, deterring buyers from considering the property.

  1. Highlighting Key Features: Good lighting can help emphasize the best features of a home. For example, a well-placed light can draw attention to a beautiful kitchen island, a cozy fireplace, or large windows that showcase a great view. On the flip side, poor lighting can obscure these key selling points, making them less noticeable in the photos.

Types of Lighting in Real Estate Photography

To take good real estate pictures, you need to know about the different kinds of lighting and how to use them well. Let’s take a closer look at the three main types of lighting used in photography: natural, ambient, and artificial lighting.

1. Natural Lighting

Natural light is one of the most desirable lighting sources in real estate photography. Sunlight streaming through windows creates a warm, inviting glow that can make spaces look larger and more attractive. Rooms that are well-lit with natural light often photograph better because the lighting feels soft, even, and welcoming.

To make the most of natural light in your real estate photos:

  • Shoot at the right time of day: The time of day has a big impact on how natural light appears in photos. Right after sunrise and right before sunset, during the “golden hours,” is the best time to take pictures of homes because the light is warm and soft. On the other hand, harsh shadows and bright spots can be caused by the midday sun, which can make shots look off-balance.

  • Avoid direct sunlight: While natural light is great, direct sunlight can be too harsh. If sunlight is streaming directly into a room, it can create blown-out highlights and deep shadows. To combat this, shoot during times when the light is softer or adjust window coverings to diffuse the light.

  • Balance natural light with artificial light: To fill in shades and make the room look balanced, natural light and artificial light work best together. The best effects come from using both types of light in a room that is well-lit.

2. Ambient Lighting

When you walk into a room, the general lighting that comes from ceiling lights, lamps, or other fixed light sources is called ambient lighting. It is important to have this kind of lighting to give the whole house a basic amount of light.

For effective ambient lighting in real estate photos:

  • Turn on all available lights: When photographing interiors, turn on all the lights in the room to create a bright, welcoming atmosphere. This helps ensure that every corner of the space is well-lit, preventing unwanted shadows or dark areas.

  • Choose the right color temperature: Different light bulbs have different color temperatures, which can change how the pictures look and how they make you feel. Warmer light (around 2700-3000K) tends to create a cozy, inviting feel, while cooler light (4000-5000K) feels more modern and clinical. For most homes, warm lighting works best, but it’s important to match the color temperature of the lights in a room to avoid inconsistencies in the photos.

  • Use dimmable lights if possible: With dimmable lights, you can change the lighting to set the mood you want. This gives you more power over how bright a room is.

3. Artificial Lighting

Often, artificial lighting is used to go along with natural and outdoor lighting. In real estate photography, this includes everything from professional studio lights to simple LED panels that can be used to fill in dark areas or highlight specific features.

Here’s how to use artificial lighting effectively:

  • Avoid overlighting: While it’s important to ensure the room is well-lit, too much artificial lighting can make the space look flat and unnatural. Try to get a good mix of natural and artificial light.

  • Use softboxes or diffusers: Professional real estate photographers often use softboxes or diffusers to create a more even, natural-looking light. These tools help spread light evenly across a room, reducing harsh shadows and giving the space a softer appearance.

  • Highlight architectural details: You can use artificial lighting to draw attention to certain features. For example, recessed lighting can draw attention to a domed ceiling, and a spotlight can draw attention to a unique architectural detail.

Finding the Right Real Estate Photographer

If you’re unsure how to handle lighting for your real estate photos, it’s worth considering hiring a professional. Searching for a “real estate photographer near me” can help you find local experts who understand how to work with different lighting conditions to produce high-quality images. With the right lighting, a skilled photographer can completely change the look of a home, making every room look its best and appealing to potential buyers.

Conclusion

Lighting can truly make or break your real estate photos. By understanding how to use natural, ambient, and artificial light effectively, you can ensure that your property is presented in the best possible light—literally. If you’re serious about creating high-quality images that attract buyers, take the time to master your lighting setup or hire a professional who can handle this critical aspect of real estate photography. After all, great lighting can make all the difference in showcasing a home’s full potential.

Categories
General

Flood To Fix: A Complete Guide To Water Damage Restoration In Homes

Any home can have water damage, which frequently happens suddenly and leaves a path of devastation that can be expensive and time-consuming to restore. Water damage, whether from a busted pipe, a leaky roof, or floods from heavy rains, can seriously affect the construction of your home and the health of your family. It’s imperative to take swift action to reduce damage and stop long-term problems like mold growth. This book will take you step-by-step through the crucial processes of water damage restoration, making sure your house is restored as quickly and safely as possible to its pre-flood state.

Step 1: Assess The Situation

The first step in any residential water damage restoration process is assessing the extent of the damage. Determine whether it is safe to remain in the house by first locating the source of the water. In cases of severe flooding, it’s essential to switch off the electricity and gas supply to prevent potential hazards. If the water damage is minimal, you might be able to handle the restoration process yourself. However, for larger-scale damage, professional assistance is highly recommended.

Step 2: Remove Standing Water

Standing water can result in serious structural damage as well as the development of dangerous bacteria and mold. It’s crucial to remove it as soon as possible. Depending on the amount of water, you can use buckets, towels, mops, or a wet/dry vacuum. For extensive flooding, renting a sump pump or hiring professionals may be necessary. Always use protective clothing, such as boots and gloves, especially if the water appears to be contaminated.

Step 3: Dry And Dehumidify The Area

Once the standing water is removed, it’s time to dry out the affected area. Open windows and doors to increase ventilation, and use fans, dehumidifiers, or even your air conditioning system to help dry the space. This step is crucial because any moisture left behind can encourage the growth of mold, which can harm your home even more and cause health issues. Aim to dry the area within 24 to 48 hours, as this is the critical period to prevent mold development.

Step 4: Clean And Disinfect

Water damage can introduce bacteria, dirt, and contaminants into your home, especially if the flooding involves sewage or groundwater. Cleaning and disinfecting all affected surfaces is a crucial step in the restoration process. Use a mixture of bleach and water or a commercial disinfectant to clean walls, floors, and other surfaces. This step will not only remove harmful bacteria but also help prevent mold growth.

Step 5: Inspect For Mold And Mildew

It is imperative to thoroughly inspect your property for any indications of mildew or mold, as they might start to grow 24 to 48 hours after water damage occurs. Check areas such as walls, floors, carpets, and furniture for any dark spots or musty odors. If you notice mold, it’s advisable to hire a professional mold remediation service, as mold spores can be harmful to your health.

Step 6: Repair And Restore Damaged Areas

After thoroughly drying, cleaning, and disinfecting the affected areas, it’s time to repair any damage. This may involve replacing drywall, insulation, flooring, or even sections of your home’s structure. In some cases, furniture and personal belongings may also need restoration or replacement. If you’re not experienced in home repairs, consider hiring a professional restoration service to handle this step. They have the expertise and equipment necessary to return your home to its original state.

Step 7: Prevent Future Water Damage

After your house has been restored, you must take precautions to keep further water damage from occurring. Check for leaks or obstructions on a regular basis in your downspouts, gutters, and roof. Ensure that your home’s plumbing system is in good condition and repair any leaks immediately. Additionally, consider installing a sump pump or water detection alarms to alert you to potential water issues before they become major problems.

The Importance Of Professional Help

While amateurs can perform certain chores related to water damage restoration, in certain cases, professional assistance is required. If left untreated, severe water damage can weaken your home’s structural integrity and cause mold to grow quickly, endangering the health of your family. Professional water damage restoration companies have the experience, equipment, and knowledge to handle these challenges effectively. They can perform thorough inspections, remove water, dry out your home, and restore damaged areas, ensuring the restoration process is safe and comprehensive.

Final Thoughts

In order to stop additional damage and expensive repairs, water damage restoration is a time-sensitive procedure that needs to be completed quickly. You may successfully recover your home from a flood or water leak by following these procedures. Always prioritize safety, and don’t hesitate to seek professional help when needed. Being proactive about maintenance and preventive measures can go a long way in protecting your home from future water damage. Remember, the faster you act, the easier it is to move from flood to fix and get your home back to its original condition.

Categories
General

When To Replace Your Dexcom G6 Transmitter: A Practical Approach

The Dexcom G6 is a continuous glucose monitoring (CGM) system designed to help people with diabetes manage their blood sugar levels more efficiently. One of its critical components is the transmitter, which sends glucose data from the sensor to your smart device. Over time, this transmitter needs to be replaced to ensure optimal performance. Understanding when and how to replace the Dexcom G6 transmitter is essential for maintaining reliable and accurate glucose monitoring.

How Long Does The Dexcom G6 Transmitter Last?

The Dexcom G6 transmitter is designed to last for approximately 90 days. After this period, the transmitter’s battery typically runs out, which means it will no longer send glucose readings to your device. Dexcom includes a built-in alert system that will notify you when the transmitter is nearing the end of its life. Usually, you’ll receive a warning at least ten days before the transmitter needs to be replaced, giving you ample time to prepare. For more detailed information on when and how to replace your transmitter, visit https://morecashforteststrips.com/how-often-do-you-change-dexcom-g6-transmitter/.

Signs That It’s Time To Replace Your Dexcom G6 Transmitter

While Dexcom provides clear alerts when it’s time to change the transmitter, there are other signs that may indicate a replacement is needed sooner than expected:

  • Decreased Signal Quality: If your device frequently loses connection to the transmitter or you’re experiencing more dropouts than usual, this could be a sign that the transmitter is failing.

  • Frequent Recalibration: While the Dexcom G6 system is designed to work without the need for frequent recalibrations, if you find yourself having to calibrate the system more often than normal, it may be time to replace the transmitter.

  • Battery Warnings: As mentioned earlier, your Dexcom app or receiver will notify you when the transmitter’s battery is low. If you receive this warning, it’s crucial to replace the transmitter promptly to avoid interruptions in your glucose monitoring.

  • System Failure: In rare cases, the transmitter may stop working entirely before the 90-day mark due to manufacturing defects or damage. If this happens, contact Dexcom’s customer service for troubleshooting or to request a replacement.

How To Replace Your Dexcom G6 Transmitter?

Replacing the Dexcom G6 transmitter is a straightforward process. Here’s a step-by-step guide to help you:

  • Receive The Replacement Notification: You will receive a notification on your device informing you that your transmitter needs replacing soon. If you haven’t ordered a new transmitter yet, now is the time to do so.

  • Wait Until The 90-Day Mark: Once the transmitter reaches its 90-day limit, you’ll be prompted to remove it. This process can’t be done prematurely unless you’re changing it due to malfunction or damage.

  • Remove The Old Transmitter: After your sensor session ends, carefully remove the sensor from your body. Gently press the edges of the sensor adhesive, then push down on the transmitter while pulling up on the sensor housing. This will release the transmitter.

  • Install The New Transmitter: Open the new transmitter packaging and attach it to the sensor. Once securely attached, follow the instructions on the Dexcom app or receiver to pair the new transmitter with your device.

  • Start A New Session: Once the transmitter is paired, insert a new sensor if needed and begin a new session. You should see glucose readings on your app or receiver within a few hours.

Planning For Replacement

To avoid any gaps in your glucose monitoring, it’s important to plan ahead for transmitter replacements. Dexcom offers a subscription service for sensors and transmitters, which automatically delivers new equipment before your current ones expire. Alternatively, if you purchase your transmitters individually, set a reminder on your phone or calendar to reorder a replacement 10 to 14 days before the 90-day mark.

Also, make sure to keep an extra transmitter on hand, especially if you travel frequently or live far from your pharmacy. Having a backup can help you avoid delays if your transmitter runs out unexpectedly.

What Happens If You Don’t Replace The Transmitter?

If you don’t replace the Dexcom G6 transmitter in time, your CGM system will stop sending glucose data to your device. This interruption can disrupt your diabetes management, potentially leading to undetected high or low blood sugar levels. To prevent this, be proactive about replacing your transmitter as soon as you receive the end-of-life alerts.

Conclusion

Replacing the Dexcom G6 transmitter is an essential part of using the CGM system effectively. While the device is designed to notify you well in advance of the replacement date, staying vigilant for signs of transmitter failure can help ensure uninterrupted glucose monitoring. By following a practical approach and planning ahead for replacements, you can continue to enjoy the benefits of accurate, real-time glucose data without missing a beat.

Categories
General

The Significance Of Renting Heavy Equipment For Construction Projects

The importance of having the right tools and equipment must be balanced in construction. Large-scale construction projects demand a wide array of heavy machinery and equipment, from excavators and bulldozers to cranes and concrete mixers. While some construction companies opt to purchase these costly assets outright, an increasingly popular and pragmatic alternative is renting heavy equipment. This article will explore the significance of renting heavy equipment for construction projects, highlighting its numerous benefits.

Cost Efficiency

Rental of tools is a cost-effective choice for many building companies. It’s expensive to buy heavy machinery, and it’s also expensive to keep it running, insure it, and store it. This overhead cost is eliminated when building companies rent equipment, which lets them carefully apply their capital.

Flexibility

Construction projects are diverse, requiring a unique set of machinery and equipment. heavy equipment for rent provides the flexibility to access specialized tools when needed. Whether it’s a backhoe for excavation or a crane for heavy lifting, construction companies can choose the right equipment for each project without being tied to a single set of assets.

Reduced Downtime

Heavy equipment can experience downtime due to maintenance and repairs. When a construction firm owns its equipment, any downtime translates into lost productivity and revenue. Rental companies, however, often provide well-maintained machinery, reducing the risk of unexpected delays and keeping projects on track.

Latest Technology

Technology evolves rapidly, and construction equipment is no exception. Rental companies typically offer the latest models, incorporating advanced features and improved efficiency. By renting equipment, construction firms can take advantage of cutting-edge technology without the burden of frequent equipment upgrades.

Expert Support

Renting heavy equipment often comes with the added advantage of expert support. Rental companies provide training and maintenance services, ensuring the machinery operates safely and efficiently. This support can be especially beneficial for smaller construction companies needing more in-house technical expertise.

Environmental Considerations

In an era where sustainability is paramount, renting heavy equipment can align with green construction practices. Rental companies increasingly offer environmentally friendly machinery, helping construction projects minimize their carbon footprint.

Project-Specific Solutions

Different construction projects have unique requirements, and renting allows companies to tailor their equipment choices accordingly. Whether it’s a short-term project that demands a specific crane or a long-term undertaking requiring a fleet of loaders, rental companies can provide project-specific solutions.

Financial Flexibility

Renting big tools can give you a lot of financial freedom. It frees up money that can be used in other parts of the building business, like adding skilled workers, growing the business, or offering more services.

Conclusion

In the construction world, where efficiency, productivity, and cost-effectiveness are paramount, renting heavy equipment has emerged as a strategic choice for many companies. The significance of renting heavy equipment for construction projects lies in its ability to reduce costs, increase flexibility, and provide access to the latest technology. Furthermore, it offers support, reduces downtime, and aligns with sustainability goals. Construction firms can position themselves for success in an ever-evolving industry by opting for equipment rental.

Categories
General

Website Design And Development For E-Commerce: Key Considerations And Strategies

In today’s digital age, e-commerce has become crucial to business growth and success. As more and more consumers turn to online shopping, businesses need to establish a strong online presence through well-designed and developed e-commerce websites. The design and development of an e-commerce website play a pivotal role in attracting and retaining customers, maximizing sales, and providing a seamless user experience. This article will explore the key considerations and strategies involved in website design and development for e-commerce.

Understanding The Target Audience

Before embarking on the design and development journey, it is essential to understand the target audience. Analyze their demographics, preferences, and shopping behaviors to tailor the website accordingly. Market research and leveraging user data will provide valuable insights into what features, functionalities, and design elements will resonate with the target audience.

User-Centered Design

The user experience (UX) of any e-commerce website is vital to its success. User-centered design concepts should guide the whole design and development process. The website should be user-friendly, simple to browse, and visually appealing. To improve the user experience, consider aspects such as responsive design, clear calls-to-action, quicker checkout procedures, and tailored product suggestions.

Mobile-Friendly Design

With the rising usage of smartphones and tablets for online shopping, having a mobile-friendly design is essential. Responsive web design guarantees that the website adjusts easily to multiple screen sizes and devices, offering consistent mobile users and an optimum experience for mobile use. This includes quick loading times and easy mobile navigation.

Clear And Intuitive Navigation

A well-designed navigation system is crucial for e-commerce websites, as it helps users find products and navigate through different sections effortlessly. Implement clear and logical navigation menus, breadcrumbs, and search functionality to enable users to quickly find what they are looking for. Refrain from cluttered menus and complex structures that may confuse or frustrate visitors. A professional website design and development company can help you create a visually appealing and user-friendly e-commerce platform.

High-Quality Product Imagery And Descriptions

In e-commerce, customers rely heavily on product visuals and descriptions to make purchasing decisions. High-quality product images from multiple angles, zooming capabilities, and videos can significantly impact the overall user experience. Accurate and detailed product descriptions highlighting key features, benefits, and specifications are equally important in providing valuable information to potential customers.

Robust Product Search Functionality

A robust search functionality is essential for e-commerce websites, especially with large inventory. Implement an advanced search feature that allows users to filter products based on various attributes such as price range, color, size, and brand. Intelligent search algorithms and autocomplete suggestions can help users find relevant products quickly and efficiently.

Secure Payment Gateway And Trust Signals

E-commerce platforms must build confidence and provide safe transactions. Integrate a dependable and secure payment gateway to provide clients with a range of payment alternatives. To create confidence and convince consumers that their information is secure, display trust signals such as SSL certificates, security badges, and customer reviews.

Seamless Checkout Process

A simplified and user-friendly checkout experience is critical for reducing cart abandonment rates. Remove superfluous stages, give guest checkout choices, and provide clear progress indicators throughout the process. Additionally, connect common payment methods, enable several delivery options, and provide order-tracking facilities to improve the entire checkout experience.